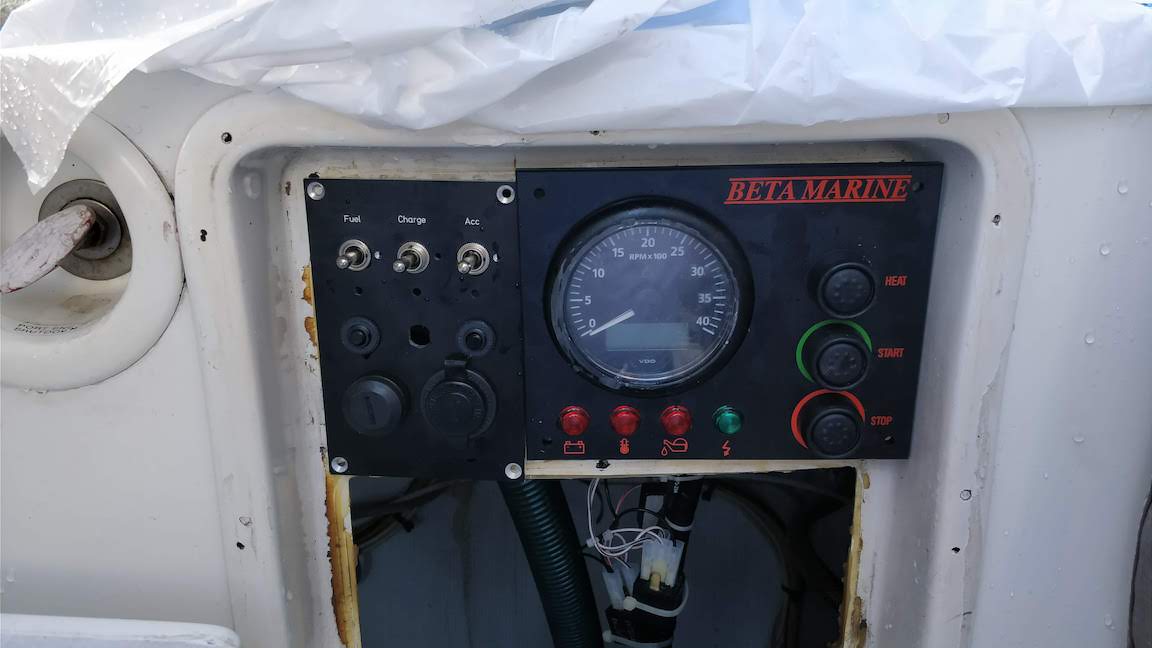
 With the engines here, it’s time to get the wiring straightened out. I spent some time working on cleaning things up last weekend, but ran out of time. But here is where the new panels will go and what they will look like. Note the tarp -- it was really raining when I was doing some of this work!
I am back again next weekend (Sat/Sun) and hope to get the rest of the wiring done, including the fuel pump, which is required for the engine install.
The external acrylic cover needs replacement, but that can wait a bit while we figure out all the wiring.
We’re down to 13 things to do before the engine is reinstalled. The list looks like this:
- Figure out how to fix the drainage problem for those six compartments on the sides of the mounts. Either fill or maybe drill some drain holes.
- Affix the control panels. We need to trim some of thin fiberglass and some screw holes.
- Figure out where the wiring harnesses will go and either drill some larger holes, remove more wires, or remove the end connector temporarily.
- Apply anti-slip rock to the steps, the drain pipe top, and the standing area in the back of the engine room.
- Install the new anti-siphon fitting as high as possible.
- See if we can use the old oil pressure sender and tee that from the new engine.
- Check for diesel leaks.
- Replace the port engine water heater hoses. They are damaged (new ones coming).
- Remove the old coolant reservoirs and install the new one.
- Get some new props and install them.
- Install the bilge pumps. They should be as far forward as possible and attached to the bottom hull somehow. The port side hose is too long.
- Replace the intake hoses on the starboard side. There are new brass fittings. Clean the starboard water strainer and reattach.
- Wire the fuel pumps. I want to run a new wire all the way back to the control panel on both engines so I can turn them off sometimes or run them without the engine running.
- Install new soundproofing
Prop wash
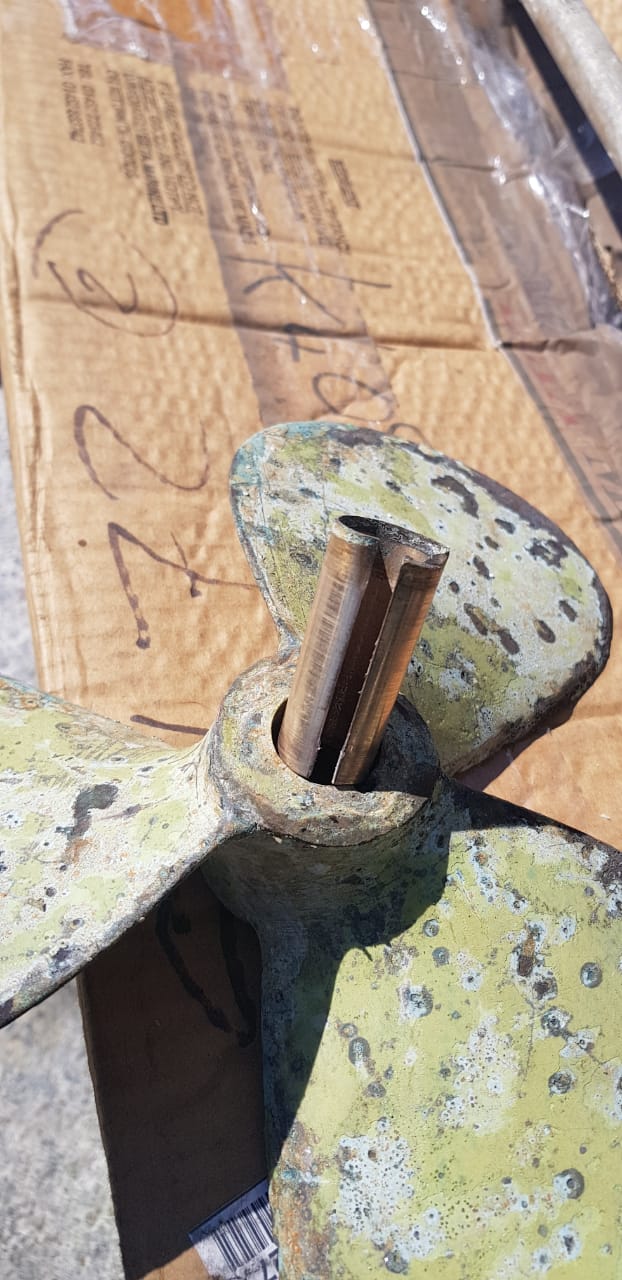 Replacing the propellers is tough -- the shaft came out so we can make 100% sure the new props, slightly larger, will fit squarely on the metric shaft that Jane’O has. Come to find out that there is actually a spacer in there to adapt the odd size propeller.
A screw broke when removing the shaft coupler too. However, they already have that fixed!
Battery Boxes
Major major kudos to Alvaro Bello at Opequimar and whoever else he got to do this. It looks so several people asked what was modified!
On the flip side, now when I step down I keep forgetting I am at the bottom.
I am back again this weekend to work on the final wiring.